How to Package Your Tools for Shipping

In this article you will find our suggested step-by-step method for packing your tools for shipping.

You will only need three items:  a box, newspaper, and tape


Step 1

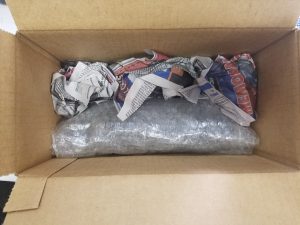
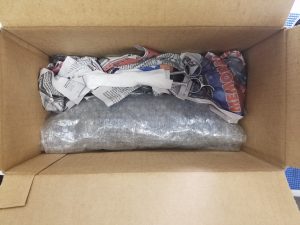
Determine the best way to package your tools.  In this example, the clippers are place on the bottom of the box and held in place with newspaper.


Step 2

Shears are added to the package away from the sides of the box and surrounded by newspaper.


Step 3

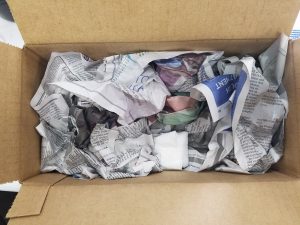
Clipper blades are placed into the package and surrounded by newspaper to keep them secure.


Step 4

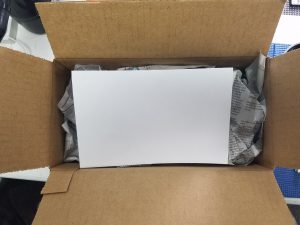
Fill the package with newspaper to keep all the contents secure.  Place the completed  Sharpening-Repair-Sheet  on top before closing the package and securely taping it shut.

How to Wrap Your Clippers for Shipping


In this article you will find our suggested step-by-step method for wrapping your shears or scissors for shipping.

You will only need two items:  bubble wrap and tape

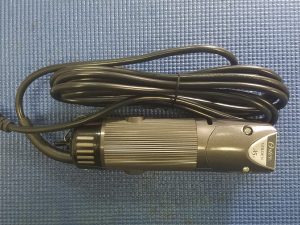
NOTE:  If you still have the original packaging for your clippers, then that is the ideal packaging to ship your clippers in.


Step 1

Neatly wrap the cord of your clippers and secure with either a twist-tie or a rubber band.


Step 2

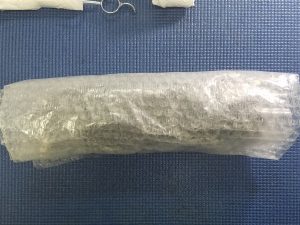
Roll your clippers (cord included) in bubble wrap and tape if necessary.

How to Wrap Your Clipper Blades for Shipping

In this article you will find our suggested step-by-step method for wrapping your shears or scissors for shipping.

You will only need two items:  paper towels and tape


Step 1

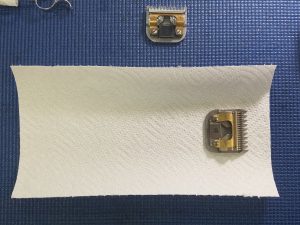
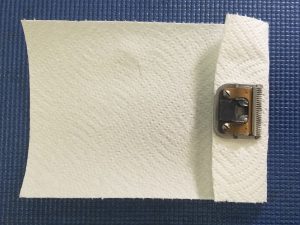
Place a clipper blade on a half-sheet of paper towel as shown.


Step 2

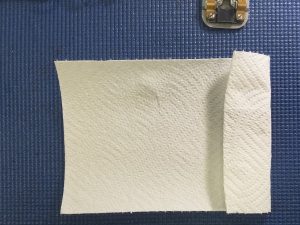
Fold the paper towel over twice so that the flat side of the clipper blade comb is up.


Step 3

If you have a second clipper blade, then place it on top of the first blade as shown.


Step 4

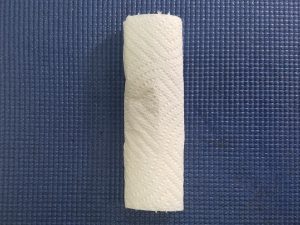
Roll the paper towel up with the two clipper blades securely inside.


Step 5

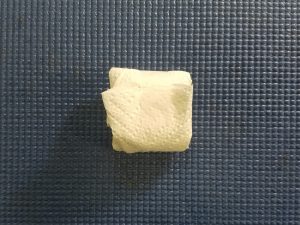
Fold the ends of the paper towel over and securely tape.

How to Wrap Shears/Scissors for Shipping


In this article you will find our suggested step-by-step method for wrapping your shears or scissors for shipping.

You will only need two items:  paper towels and tape


Step 1

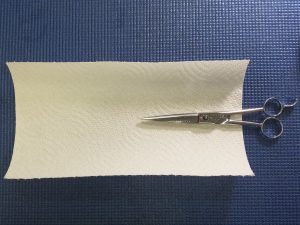
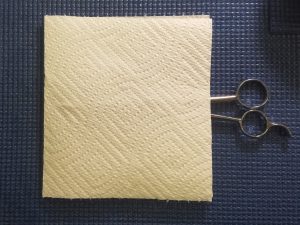
Place your shears/scissors on a half-sheet of paper towel as shown.


Step 2

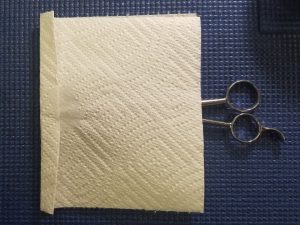
Fold the half-sheet of paper towel in half leaving about half an inch of paper towel below the tip of the shears/scissors.


Step 3

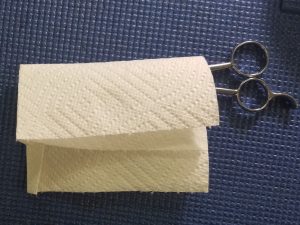
Fold the remaining half inch of paper towel as shown.  Tape to hold, if desired.


Step 4

Fold one half of the paper towel over the shears.


Step 5

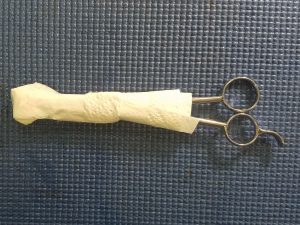
Roll the paper towel completely around the shears/scissors and tape securely.  Also, tape over the end of the paper towel where the tips of the shears/scissors are to give added protection to the tips.

Do you do any repairs or sharpening at my shop/salon/suite?

No, all services are done at our shop in Buford, GA. 

We can provide you the superior quality that you expect and deserve only while working within our shop where we have access to everything that we need.  Just like you, we provide the quickest and best service when we are in our shop.  For us, trying to do our best work in your shop is like you trying to do your best work in someone’s kitchen.


Do you provide pickup and delivery?

No.  We have four methods for receiving and delivering your tools:  You can mail your tools to us, and we will mail them back.  You can drop them off to us, and we can mail them back.  You can mail them to us, and you can pick them up.  Finally, you can drop your tools off and pick them up.


Never Pay for Repairs, Sharpening, or New Tools, Again!



If you are a barber, stylist, or groomer, then you should NEVER pay for repairs, sharpenings, or new tools.  Yes, you read that correctly.  I can hear you shouting at your screen, “Well, Josh, then WHO does pay for my stuff?!?!?”  First, quit yelling at your screen, you look like you are insane.  Second, YOUR CLIENTS DO!

Your clients will pay for every single repair, sharpening, or new purchase that you make, but you must be a little creative and put some extra thought into how you want them to take care of you.  You need to view each client as either a Sugar Daddy or a Sugar Mama.

One method is that you can do all kinds of math.  You must look into the future and try to predict how much you are going to spend on repairs, sharpening for your shears, clippers, and trimmers, and how much you will be spending on purchasing any new tools.  Then you add all that up and divide it by the number of clients that you are going to have over that same period of time.  This gives you the Cost Per Cut (CPC) and tells you how much you need to charge each client for them to pay for your stuff.  This is slightly too complicated for me and involves too much guess work, but for some people this is exactly how they want to go about this.

Another method (my preferred method) is that you charge each client a specific amount that goes directly into your Tool Fund and stays there until you need it.  For example, you are a barber who cuts 10 clients a day, and you work 6 days a week.  That gives you 60 clients each week.  If you raise your prices by $.50, then you get $30 per week that your client has put into your Tool Fund.  Assuming you work 48 weeks a year, then your clients have put $1,440 into your Tool Fund for you!  I KNOW that you do not pay over $1,440 a year to maintain your tools, or even buy new ones.

Stylists, you may need to raise your prices by a dollar or two because you tend to have less clients in a day than a barber does, but you generally charge more, anyway.

Groomers, the same goes for you as the stylist.

“But, Josh, I work in a place where I do not control the prices.  I can’t raise my prices for my clients to build me a Tool Fund.”  I told you earlier that you must think creatively.  You still get tips, right?  Well, your tips can be where your clients are building your tool fund.  For every client who tips you at least $2, you put $.50 into the Tool Fund.  You can also go with $.25 of EVERY dollar that they tip, so a $5 tip gives you $1.25 into your Tool Fund.  You could choose to put the first $5 in tips you get into the Tool Fund and the rest is yours to keep.

I think that you get the point by now.  Think creatively, let your clients build your Tool Fund, and never pay for repairs, sharpening, or new tools, again!

If you have any questions about building a Tool Fund, or want to bounce ideas around, then please contact us.  We are available to help you in any way that we can.

 

How often should I get my clipper blades sharpened?

Nebraska Blade’s 16″

The answer to the question is very simple and very complicated:  It depends.

It depends on the type of hair/fur you are cutting.

It depends on how often you use your blades.

It depends on how well you maintain your blades.

It depends on if you oil the blades regularly.

It depends on if you have dropped the blades.

It depends on if the last person to sharpen your blades knew what they were doing.


The bottom line is that YOU must tell your sharpener when your clipper blades need sharpening.  You know your tools, and you know when your clipper blades are no longer cutting like you need them to.  If you follow T.P. C.A.T.S. (here), then you will know if your blades need sharpening or if there are other issues with your blades/clippers that need to be addressed first.

How often should I get my clipper blades sharpened?  As often as necessary to keep your blades cutting smoothly, to keep your blades from pulling hair/fur, and to keep your client’s hair/fur healthy by being cut cleanly and not ripped apart.  Want to give your clients split ends?  Use a dull clipper blade.  Works every time.

There have been people to get their blades sharpened 5 times in a single day because of the incredibly coarse fur that they were cutting.  Coarse fur will dull your blades very quickly.  There are also people who only get their blades sharpened once a year because their usage is low, and they do a good job at maintaining the blades during and after usage.

Keeping your blades sharp helps you cut faster, smother, and will give you a solid foundation to build your skill on.  Dull blades will take up your time, hurt your client, and not give you the freedom to enhance your skills (unless you are trying to become the most skilled hair-professional at cutting with dull blades).

Sharp blades = more money


How should I oil my blades?

We love being asked the question, “How should I oil my blades?” because it means that someone is thinking about oiling their blades!  A lot of the blades that we see in the shop only get oil on them when we oil them, and then the blades do not get another drop until they come back to us for sharpening.  You are decreasing the cutting ability of your blades, you are decreasing the life of your blades and your clipper/trimmer, and you are causing your client pain because your blades are getting HOT due to friction.

Okay, I am off my soapbox and going to answer your question now:  3 drops on the cutting edge and 1 drop on each side.

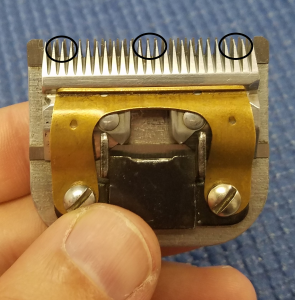
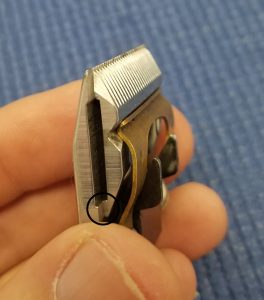
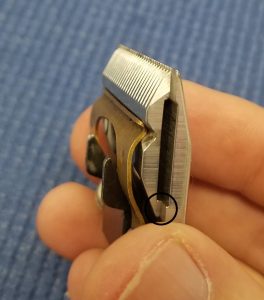
You only need 3 drops along the cutting edge of the blade (Figure 1) and 1 drop on each side (Figure 2a and Figure 2b), and then let your clipper/trimmer run for about 10 seconds to spread out the oil.  Finally, wipe off the excess oil.  You are now ready to start cutting your next client with well-oiled blades.


 Figure 1

 Figure 2a

 Figure 2b

Finally, ANY clipper oil is fine.  Andis oil works on Oster blades, Wahl oil works on Andis blades, etc.  So, go dig out those little tubes of oil that came with your clippers and trimmers and start using them right now!  If you do not have any oil, then buy some TODAY!  You are wasting money by not using oil, and you are hurting your clients by touching them with blades that are getting extremely hot extremely fast.

Not oiling your blades is the same as throwing money away because you will need to buy more blades more often or have them sharpened more often.  Also, you are placing stress on your clippers and trimmers that causes them to wear out faster which means more money spent on repairs or on new tools.

Save money!  Use oil!


What is the correct way to put detachable blades on?

Conventional wisdom says that you should turn your clippers off before taking the blades off and before putting blades onto your clippers, but conventional wisdom is wrong! 

Oster, Andis, and Wahl all state that you should turn your clippers OFF to remove the blades, and they all state that you are to turn the clippers ON to put the new blades on.  That is correct: ON.  Let me say that one more time: Turn your clippers ON before snapping detachable blades onto your clippers.

Just in case you don’t believe, me here is what Oster, Andis, and Wahl each say in an instruction manual for one of their clippers.  You know the instruction manuals, right?  That folded up piece of paper that you didn’t bother unfolding and reading.  Yea, that one.


Oster 76

REMOVING OR REPLACING BLADES

TO REMOVE: IMPORTANT! STOP MOTOR; lift blade away from clipper and slide off tongue.

TO REPLACE: Turn motor on; insert blade on tongue fully then snap blade into place.


Andis Ultra Edge

REPLACING OR CHANGING BLADE SET

To replace or change your blade set, slide the blade bracket onto the hinge of the clipper (Diagram F) and with the clipper turned “ON”, push the blade towards the clipper to lock into position.


Wahl KM10

2) Remove/ replace blade

  • The clipper should be switched off before removing blades. Remove blade. (fig. 5) The cutting head can be removed by pressing the button under the blade and pushing the blade away from the housing. Note: Blade button not available on all models. To refit the blade set, the clipper should be turned on and running. Fit the blade into the metal guide and press it into place. There will be a definite “click” when the blade is snapped in place.


What is the correct way to put detachable blades on?  Turn the clipper on, then snap the blade into place.